
NOSE EXTENSION
Noses Knows
By ERIC COBB
Posted 5/12/2008
For some unknown reason you want to put a new nose on your Ez. Maybe you don’t like the way the old nose looks or you want to improve your center of gravity by moving the battery forward of datum 0 for installation of a bigger engine or get the battery out of the cockpit area. You might wonder how this will change the flying characteristics of your Ez. Remember the first time you flew an Ez? You probably got to ride in the back seat and the pilot; builder let you feel the way it felt. Like nothing you have ever flown before, I’m sure. In the back seat you were sitting right on the center of gravity and everything pivoted around you. I still like the way the Ez flies from the back seat. Not at all like the front. As a matter of fact, the back seat is so different then the front it’s a totally different plane. The back seat is the pits. Not a Pitts but the pits. Not much down visibility unless you are in a bank. The front is the place to be and the feel is a little different. Anytime you extend the arm from the fulcrum point you get a little heavier response from the control inputs. But let’s put that into perspective. Let’s say you added eight to ten inches to the nose, the center of gravity and the pilot station remained the same, considering the forgiving air, this is nothing you could measure by any means. The big difference comes when you put that bigger engine on. With the added weight now you have a very different handling craft, but you can not beat horsepower and it will make up the difference. This is a far cry from what the designer had in mind when he built the first light weight prototype. And now over the years of adding electric speed breaks, pitch, roll trims, and every instrument known to man the light responding Ez has become another bonanza in the skies.
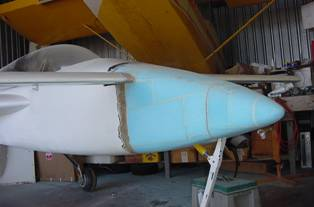
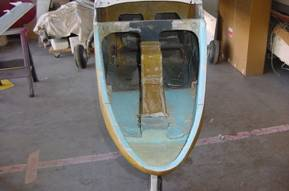
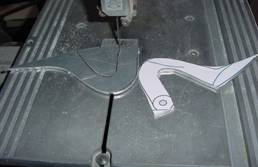
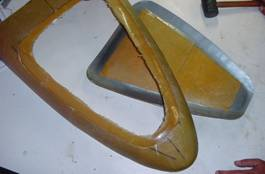
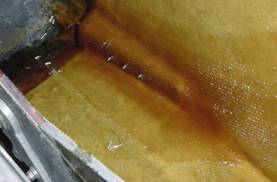
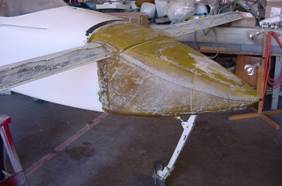
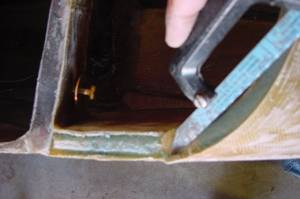
When it comes to removing a nose from an Ez, I use a saws-all, and I can have the nose off in a few seconds with a gleam in my eyes. The trick is knowing where to cut. I start right along the forward side of bulk head F-22 and along the outside of NG-30s. The trick is to get the nose off in one peace so you can hang it in the hanger making it look like it is coming through the wall.
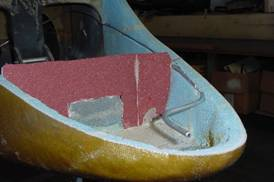
This is the time to clean up the nose cranking mechanism and put it in perfect order. Install the canard and start blocking out the foam. Think about what it will look like while you are doing this. This will help you put enough foam on to get the right shape.
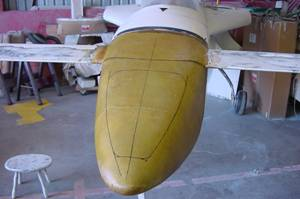
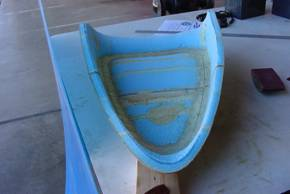
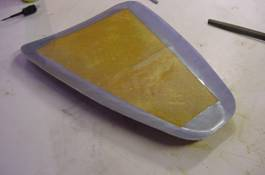
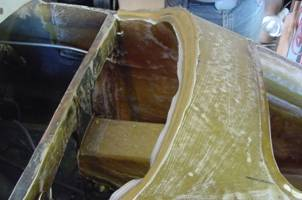
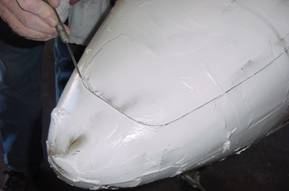
Carving the nose is the most rewarding part of the project because you start to see what the final project will look like. Take your time with this and go away from time to time and when you come back you will always see something that needs a little touching.
Remember, even if you don’t get it quiet perfect you will get another chance when you do the final fill and sanding. I like to start at the highest point and work to the lowest. I also use a chock line to put a center line down the top so I can measure from side to side.
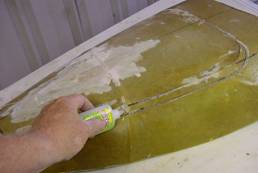
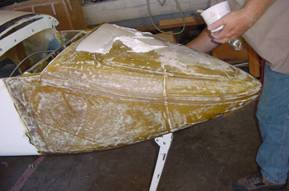
Once you are satisfied with the way it looks it is time to glass the out side. Make sure you do a good sanding where the glass will attach to the side of the fuselage and under along where the gear is. Glass to glass is your strongest bond so do a good sanding job.
Glassing the out side I use UNI-directional three plies. The first two are at thirty degrees orientation to the length of the fuselage crossing each other and the last ply is straight down the center.
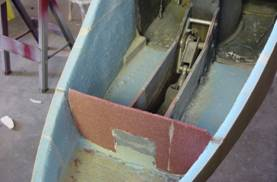
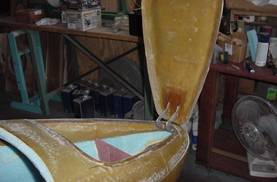
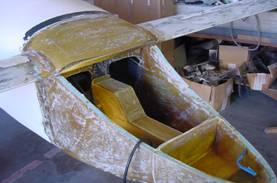
After cure I then mark out for the door, why not make a door big enough to get into. There is nothing worse then trying to work in the nose area with a too little door, unless you're building a ship in a bottle. I then cut around the nose again so that I can get into the area to remove the canard and carve the foam out from the inside. This is a laborious task but rewarding when finished.
The top of the nose is then temporary bonded to a two by four, I use Bondo for this, and clamp to the work table for carving. Around the door edge I remove all the foam so that I can have glass to glass attachment. This is also where the lip for the door will be installed.
Notice that in the carving process I removed the forward bulkhead. I used it for location and this will be put back in place before glassing the inside. I use two plies of bidirectional 8oz. fiberglass for the inside. Now glass the inside of the door.
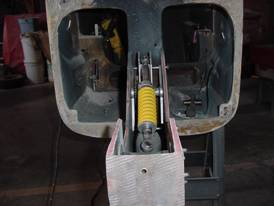
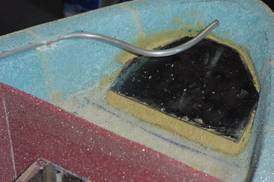
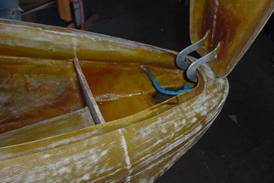
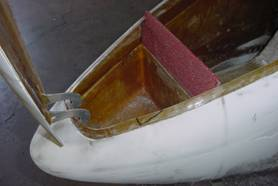
Time to make the rudder attach points that you removed when you cut the old nose off. I make mine adjustable in three places. Not everyone is the same size and it helps to make it adjustable to add to comfort for us long leg types.
I also make the hinge for the door at this point. I don’t like the door on the ground for someone to kick or the wind to take away and scratch. I use a trunk style hinge for this custom made
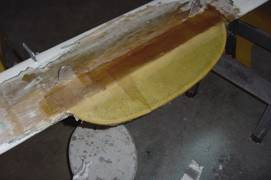
After cure I cut out the door, sand it to as perfect shape all around as I can get, duck tape, the inside of the door and sand the out side of the inside door rim so that the lip will attach itself to the rim and not the door.
I then super glue the door back in place and glass three plies of bidirectional around the door edges and onto the rim.
After the epoxy cures tap the door with a rubber hammer to free the door from the rim frame. Trim the new lip to about ½ inch all around. Now take your hinge and place it on the door and frame for marking to fit.

Use 5-minute epoxy to tack the hinge in place and exercise the door after cure to check for fit. If the hinge needs to be repositioned use a hot air gun to loosen the 5-minute and remove the hinge. I put three ply of bidirectional glass over the micro fill. I use pill-ply to hold down the edges.
Prep the inside of the nose for glassing. Notice I reinstalled the forward bulkhead. This will continue up and mate with the door when finished.
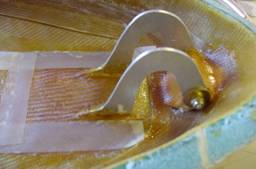
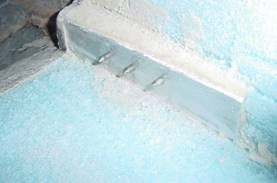
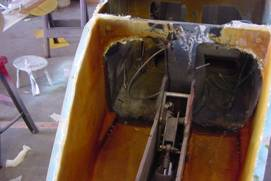
Again sand where the glass to glass bonding will occur. I install a ¼ inch of plate steel, floxed in place, in the nose incase I forget to put the landing gear down. This will give me a something to grind on instead of the battery. I also add more foam forward of the bulkhead so the battery will set at 90 degrees to the bulkhead before glassing.
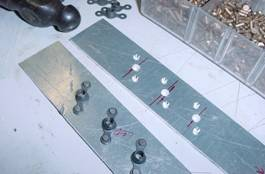
I install 10/32 screws with the heads cut off and filled to a point so the glass will fit through and not allow epoxy to get into the nut plates. I also take this opportunity to install the pitot tubing and embed it in the foam. This keeps it out of the way and makes a neater installation. Remember to keep it slanting down so that if any water gets into the system it will automatically drain out.
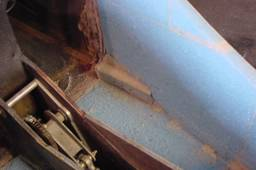
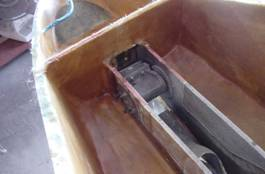
Check the nose door hinge to make sure it is working correctly. Make sure that the door does not touch the top of the nose when the door is fully open. If it does you might have to put blocks under the hinge to prevent this or it will mark the final paint job and not look good after several openings of the door. Close out the cut off part of the canard. Do this as per plan and use a flox corner
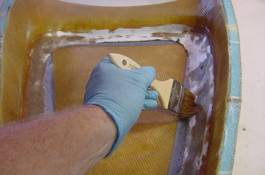
Now glass the inside of the nose. I use two plies of bidirectional 8 oz. glass and sand- wage the extra plies around the rudder pedal pivot point and the canard lift bushing in between. Again follow the number of plies per plan.
I also put extra plies of BID (4) on both sides where the NG-30 attaches to the forward bulkhead.
It always takes longer if you watch it cure and the first ply is always the hardest to do.
Sand and trim everything and especially where the top attaches to the nose. Remove the pins that you installed where the rudder peddles go and sand the area.
Reattach the canard and trial fit the top of nose to see how it fits in regard to the canard. When you are satisfied with the fit, and you might have to do a little sanding to get correct fit, mix up three shots of epoxy and make a micro mix. My rule is not so dry that nothing sticks but if the stir stick can stand up straight without falling over that would be just about right. Pile the micro along the top edge bringing it to a point along the center line and place the top of nose in place removing any squeeze out with the stir stick. Make sure everything lines up correctly or as close to center all around.
Glass two plies of BID around the outside on nose and allow curing. Remove any squeeze out from the inside but do not glass until outside is cure. You run the risk of the top moving. Do the same inside but just one ply of BID and sand all around.
With the nose door closed micro fill all around the top of nose. This is the fun part. Like frosting on a cake. I like to use the West System with the slow hardener. Don’t over work the fill or it will start to pull. Just get it on and leave it alone. Then take an axacto knife and trim the door opening using the door as your guide. This will make a good close gap for the door. You might have to do several coats and sandings to get everything filled and lined up correctly.
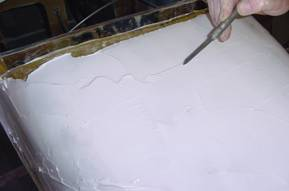
Come back the next day and sand it smooth. If you time it right you can find the right time when it sands the best. Not too hard or so soft that it gums up the sandpaper.
This is a good time to check the contour of the canard and do any filling that is necessary.
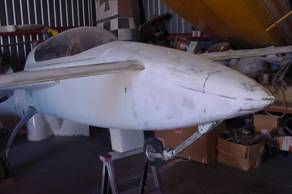
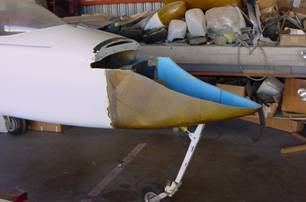
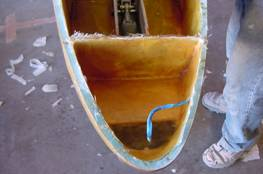
Finished Product
Thank you Eric for sharing your hard work and this informative process.